To get your website up and running, the most important blogging resource you’ll need is web hosting. It isn’t as technical as it sounds to be. With some simple and easy steps, learn in detail on how to setup WordPress website on Hostinger in less than 20 minutes!
Before we get into the steps, a little background on Hostinger. Hostinger International, Ltd. is a web hosting provider and internet domain registrar with over 29 million users across 178 countries worldwide [source: Wikipedia].
In this Hostinger WordPress tutorial, you will find a step by step guide on how to buy web hosting from Hostinger, setup WordPress website domain on Hostinger, setup a professional email id unique to your website (example: [email protected] or [email protected])
To elaborate a little more on their value for money policy, they provide a FREE SSL certificate and also a domain name (eg: .com, .net, .org, .in, etc.)
All of this along with fast functioning website with Cloudfare, Git and SEO Toolkit, WooCommerce integrations. They have an amazing chat based support 24/7 to help you out whenever you need.
You can host your website with $0.99 per month! You can start a completely new website or transfer your old website too.
How To Setup WordPress Website On Hostinger
This post contains affiliate links through which we may make a small commission. This will not cost you extra money. For more information on Affiliate marketing, read our Affiliate Disclaimer.
1. Choose Web Hosting Plan
To host your WordPress site on Hostinger, choose a web hosting plan from Hostinger website. They have 4 options as you can see in the screenshot below.
If you want to start a simple independent or personal blog type website, then Single Shared Hosting is the best option. I personally use this too and my website functions perfectly.
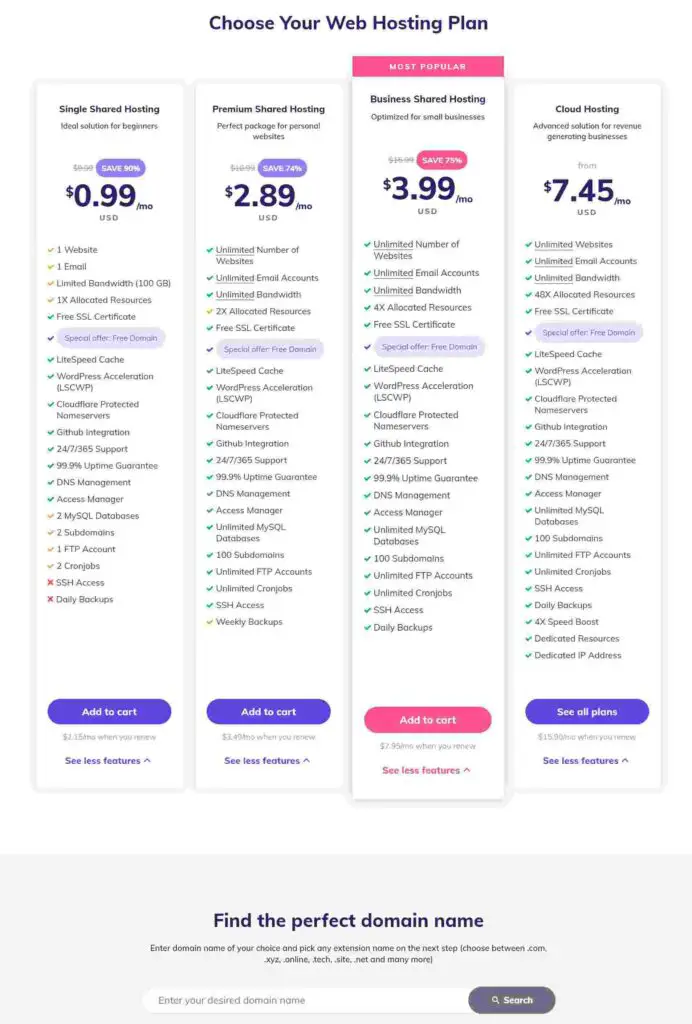
If you are starting a business, then you can choose one of their business plans. With this, you can have unlimited websites. Read the full description at Hostinger.com.

You can choose if you want the hosting for 1 month, 12 months, 24 months or 48 months. Once you’ve decided what plan you want, go ahead and finish up the payment process.
If you have a domain name in mind, then you can check if that name is available or has been taken. You can do this without signing in as shown in the screenshot above.
2. Build WordPress Website With Hostinger
In this step, you will install WordPress website with Hostinger. After you are done with the payment process, log into your Hostinger account and click on Home in the top left corner. Then click on setup.
You will be lead to a new page where you can choose your website name or use an existing name.
The domain name or website name you chose while setting up your account in step 1 will be available here. Select it. Else choose your existing domain name.
The next page will look like the screenshot below. Select WordPress if you want a website only. Select WooCommerce if that’s what you’re going for or other.

Create your WordPress account after selecting your option. Here you’ll be asked about the details of what site you are setting up, your email, website theme etc (you can change these later on also).
After you’re done with it, you will be taken to the ‘finish setting up’ page. You can choose your website location here. Click on Finish Setup and you’re done!
3. Customize Your Website
Once Hostinger has finished setup of your website, you can click on Manage WordPress and click on WP Admin (found on right side). WP Admin is where you can change the theme, comments, settings, plugins and many other stuff.
You can log into your WP Admin Dashboard anytime by typing /wp-admin after your website name in the url. Example: yourwebsitename.com/wp-admin/
After you’re done with this, follow step 4 and come back here and follow these steps below.
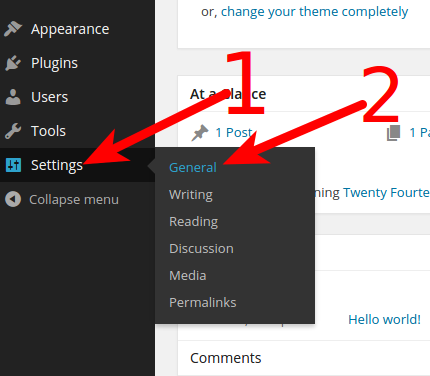
After you’ve activated SSL Certificate, go to setting on your WP Admin Dashboard and click Settings -> General. Here you can change your site title, tagline, timezone, etc.
Below Tagline, there’s WordPress Address (URL) and Site Address (URL) which will be http://yourwebsitename.com. Add an ‘s’ after p in http and save the changes.
Before: http://yourwebsitename.com
After: https://yourwebsitename.com
4. Activate SSL Certificate
SSL (or Secure Sockets Layer) Certificate ensures encryption and provides secure information exchange between web servers and browsers. Learn why SSL is required and how SSL Certificate can affect your on-page SEO in this Basics of SEO for Beginners post.
To activate your SSL Certificate, all you have to do is go the Hostinger Dashboard and scroll down to find SSL Certificate. And then click Setup.
Now choose your website name and click on Install SSL. When you see a green button that says ‘Enabled’ on it, your SSL is successfully installed.
You can type in https://yourwebsitename.com/ in the search bar and your website shows up. This indicates that your SSL Certificate is functioning properly. After this step, go back to step 3 to change some settings.
Click on the below image (affiliate) to activate best deals for amazing rates!

5. Setup A Professional Email Id On Hostinger
A professional email address will make brands and Ad networks want to take you more seriously.
To setup a professional email id like [email protected], go to Hostinger Home and click on your website name.
Then scroll down to find Emails as shown in the screenshot.
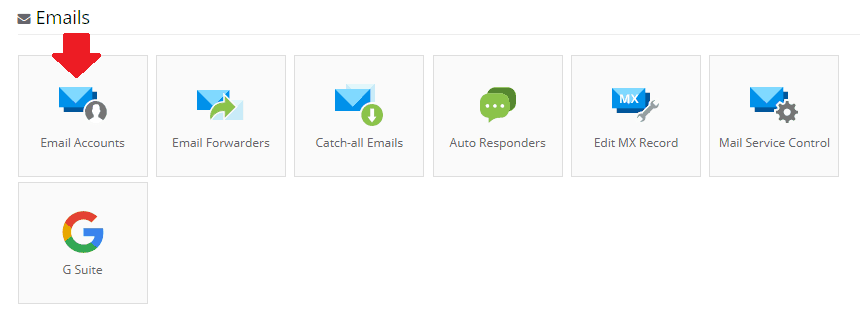
Click on Email Accounts and setup a professional email for your website. You will find all the emails sent received here.
See how easy it was? Now you have setup a fully functioning WordPress website on Hostinger in less than 20 minutes! This is just the beginning.
If you want to grow your audience and make the most of the blogging world, then check out the Best Blogging Resources and Tools post!
If you found this useful and have suggestions, then leave them in comment section down below. I would love to hear what you have to say!
Please be sure to subscribe for more content related to Blogging, Personal Development and College! I would be very appreciative of your support!!
Truely a quick guide explained in simple steps